Scientific Linux 6.2にOracle XE 11g R2をインストールする
環境
手順
1. まずはダウンロード
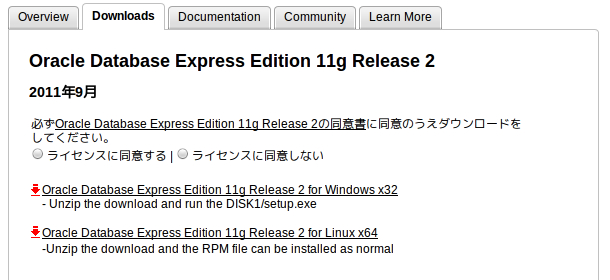
下記からパッケージをダウンロードします。
Oracle Database Express Edition 11g Release 2のダウンロード
Windows用(32bit版)とLinux用(64bit版)がありますが、今回はLinuxに入れるので
Oracle Database Express Edition 11g Release 2 for Linux x64
のほうをダウンロードしてきます。

ダウンロードにはOracleのユーザ登録が必要です。事前にこのあたりから登録してください。
2. 必要なパッケージをインストール
と言ってもScientific LinuxをBasic Serverとしてインストールしたら、特に何もしないで大丈夫でした。
公式のドキュメントによると、
- glibc should be greater than or equal to 2.3.4-2.41
- make should be greater than or equal to 3.80
- binutils should be greater than or equal to 2.16.91.0.5
- gcc should be greater than or equal to 4.1.2
- libaio should be greater than or equal to 0.3.104
http://docs.oracle.com/cd/E17781_01/install.112/e18802/toc.htm#BABHICJH
が必要らしいので、無い場合はyumなどでインストールしてください。
3. Oracleをインストールする
まずはダウンロードしたファイル(oracle-xe-11.2.0-1.0.x86_64.rpm.zip)を展開して、中身を確認します。
$ unzip oracle-xe-11.2.0-1.0.x86_64.rpm.zip
$ ls
Disk1  oracle-xe-11.2.0-1.0.x86_64.rpm.zip
$ cd Disk1/
$ ls
oracle-xe-11.2.0-1.0.x86_64.rpm  response  upgrade
中にrpmパッケージが入っているので、rootでインストールします。
$ su
パスワード:
# rpm -ivh oracle-xe-11.2.0-1.0.x86_64.rpm
準備中...                ########################################### [100%]
   1:oracle-xe              ########################################### [100%]
Executing post-install steps...
You must run '/etc/init.d/oracle-xe configure' as the root user to configure the database.
次に、 /etc/init.d/oracle-xe configure を実行しろとのことなので、実行しましょう。
途中、
- Application Expressのポート番号(デフォルトは8080)
- データベースリスナーのポート番号(デフォルトは1521)
- DBのアカウントのパスワード(SYSとSYSEMもこのパスワードになる)
- OS起動時にOracleを起動するかどうか(デフォルトはyes)
について聞かれるので、適宜設定します。
# /etc/init.d/oracle-xe configure

Oracle Database 11g Express Edition Configuration
-------------------------------------------------
This will configure on-boot properties of Oracle Database 11g Express
Edition.  The following questions will determine whether the database should
be starting upon system boot, the ports it will use, and the passwords that
will be used for database accounts.  Press <Enter> to accept the defaults.
Ctrl-C will abort.

Specify the HTTP port that will be used for Oracle Application Express [8080]:

Specify a port that will be used for the database listener [1521]:

Specify a password to be used for database accounts.  Note that the same
password will be used for SYS and SYSTEM.  Oracle recommends the use of
different passwords for each database account.  This can be done after
initial configuration:
Confirm the password:

Do you want Oracle Database 11g Express Edition to be started on boot (y/n) [y]:

Starting Oracle Net Listener...Done
Configuring database...Done
Starting Oracle Database 11g Express Edition instance...Done
Installation completed successfully.
成功したようです。rootでの作業はここまで。
4. 環境変数を設定する
ORACLE_HOMEなどの環境変数の設定です。下記のシェルスクリプトで必要なものを設定してくれるようになっています*1。
/u01/app/oracle/product/11.2.0/xe/bin/oracle_env.sh
というわけで、Oracleを使うユーザの.bashrcに以下の1行を追加するだけで完了です。
. /u01/app/oracle/product/11.2.0/xe/bin/oracle_env.sh
念のため、.bashrcを読みなおしておきましょう。
$ source ~/.bashrc
これでパスの設定などが行われ、sqlplusが使える状態になります。
5. 動作確認する
sqlplusを起動し、systemでログインしてOracleのバージョンを表示してみます。
パスワードは手順3.の途中で入力したものを入れればOKです。
$ sqlplus system

SQL*Plus: Release 11.2.0.2.0 Production on 日 3月 18 01:24:57 2012

Copyright (c) 1982, 2011, Oracle.  All rights reserved.

パスワードを入力してください:


Oracle Database 11g Express Edition Release 11.2.0.2.0 - 64bit Production
に接続されました。
SQL> select * from v$version;

BANNER
--------------------------------------------------------------------------------
Oracle Database 11g Express Edition Release 11.2.0.2.0 - 64bit Production
PL/SQL Release 11.2.0.2.0 - Production
CORE    11.2.0.2.0      Production
TNS for Linux: Version 11.2.0.2.0 - Production
NLSRTL Version 11.2.0.2.0 - Production
うまくいったっぽいですね。
まとめ
そんなわけで、Scientific LinuxにOracle XE 11g R2をインストールしてみました。
特にハマることもなく、すんなりインストールできるもんですね。